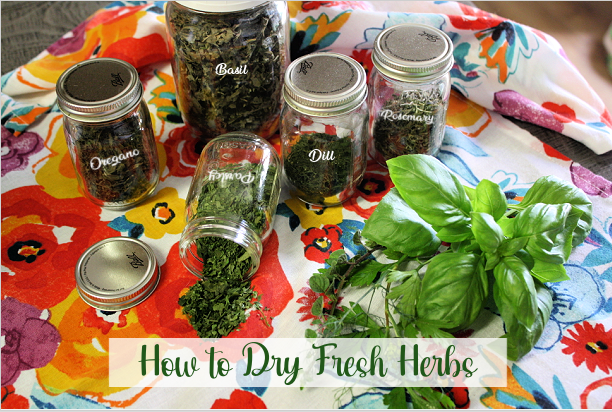
Drying and storing your fresh herbs is a great way to retain their flavor so you can enjoy them year round. Drying herbs in the oven only takes about an hour and it's so easy.

Do you have an abundance of herbs growing in your garden? Today I want to show you an easy method to dry fresh herbs and preserve their flavor for months. Each year I plant an herb garden and we enjoy fresh herbs right out of the backyard throughout the season. It doesn't take long for herb overload to set in, so you will have to find a way to preserve them.
There are 2 methods for drying herbs. You can tie them together and hang them up to air dry naturally. Which is a good method, but it takes up space as well as time. The other method is oven drying herbs which is the quickest and my preferred method to dry herbs.
A lot of folks will say that the herbs lose their potency, but that has never been the case for me. As long as you dry your herbs at a very low temperature which is the lowest setting on your oven (170 F degrees on my oven) you shouldn't have any issues. Herbs can be dried in your oven in about an hour, from start to finish.
My favorite herbs to dry are basil, purple basil, Greek or Mexican oregano, dill, parsley, mint, chives and thyme. Occasionally I will dry some rosemary, but I prefer it fresh. This herb drying process can be used to dry most herbs. Let's get started.

Follow these simple steps to make your herb garden last.
To start harvest your herbs. Wash and thoroughly dry the herbs to remove any dirt or bugs. Shake off any excess water.
Remove the leaves from the stems and spread the herbs in a single layer onto a large baking sheet lined with parchment paper or foil. It may take more than one baking sheet. It just depends on how many herbs you have to dry.
Set the oven to the lowest temperature. Mine is 170 degrees. Place the baking sheet in the oven on the middle rack. Bake the herbs for 30 minutes, turning the pan and continue baking, checking every 30 minutes until dry.
Mine took a about an hour and half to completely dry. When you can crumble the herbs between your fingers (with no damp spots), they're done. Allow the herbs to cool completely before crushing, and storing in a container.
I like to place my dried herbs into a large ziplock bag to crush them up.
Once they are crushed store into small spice jars. Label and date.
Herbs from leaves and flowers have a shelf life of 1-2 years if stored properly.
Recently I purchased this mesh herb drying rack from Amazon and use it in my garage. When the temperature is too hot to turn the oven on, I use this drying rack. I have had great results and love using this mesh herb drying rack. My herbs normally take just a couple days to fully dry and the herbs retain their color better versus oven drying. I add little paper labels on each shelf inside so I can tell the herbs apart.

How to Dry Fresh Herbs in the Oven
Drying and storing your fresh herbs is a great way to retain their flavor so you can enjoy them year round. Drying herbs in the oven only takes about an hour and it's so easy.
Prep time: 20 MinCook time: 1 HourTotal time: 1 H & 20 M
Ingredients
- Fresh Herbs of your choice
- Large Baking Pan (more than one depending on amount of herbs)
- Foil or Parchment Paper to line pan
- small jars or spice jars to store dry herbs
Instructions
How to oven dry fresh herbs
- First, wash and thoroughly dry the herbs to remove any dirt or bugs. Shake off any water.
- Remove the leaves from the stems and spread the herbs in a single layer onto a large baking sheet lined with parchment paper or foil. It may take more than one baking sheet. It just depends on how many herbs you have to dry.
- Set the oven to the lowest temperature 180 F or lower is best (mine is 170 F degrees). Place the baking sheet in the oven on the middle rack.
- Bake the herbs for 30 minutes, turning the pan and continue baking, checking every 30 minutes until dry. Mine took a about an hour and half to completely dry, but can take up to 2 hours depending on your oven.
- When you can crumble the herbs between your fingers (with no damp spots), they're done. Allow the herbs to cool completely before crushing, and storing in a container. I store my herbs in the mini ball spice jars.
- Herbs from leaves and flowers have a shelf life of 1-2 years if stored properly.
Notes:
Allow the herbs to cool completely (any moisture can cause mold). Also depending on what herb you are drying, the green color will sometimes fade to more of a greenish- brown color which happens with air drying as well. This has no affect in the flavor of the herbs. They actually look just like the dry herbs purchased in the grocery store
Click here to learn how to make herb flavored bombs using fresh herbs.


5 comments
Thankyou for posting these instructions